Apollo Desktop Installation for Windows
Apollo Desktop is a Windows 10/11 application. It is required to connect to an Apollo game as a Facilitator. It can also be used for participants who are in Team B or Team C roles for that round of the game. It cannot be used for Team A roles, which require a VR headset.
Before installing the new client, please ensure you delete any previous versions of Apollo. Also be sure to delete any corresponding desktop shortcuts used for these previous versions. This will prevent you from running the older version by accident, as this could cause problems in a session due to version mismatches.
Apollo Desktop is not available for MacOS
Jenson8 applications run as installed Windows 10/11 executables. For security and ease of distribution and updates, we use Microsoft's ClickOnce installer technology. This allows users to install our securely signed software from a URL, often without having administrator access to their machine. The software runs in an isolated environment and should not interfere with other software on the same computer.
On first run, our Apollo and Boomerang applications will request access to network resources including standard web HTTP ports 80 and 443, Photon game server TCP ports 4530-4531 and UDP ports 5055-5056. Apollo also requires access for Vivox VOIP ports in the TCP range 12000-65000 and UDP 6250, 5060 and 5062.
For a video tutorial of how to install Apollo, please refer here.
Steps to install:
- The Apollo Desktop installer is available from the following link:
https://j8cloudvr.s3-eu-west-2.amazonaws.com/installers/apollo/release/Apollo.application
The installer will download the required installation files and complete the installation - We recommend opening the link above in Microsoft Edge web browser. You can download the installer in a different browser, but in some cases installation fails if not run in Edge.
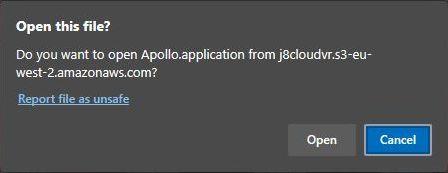
- A dialog box is displayed in Edge titled “Open this file”? Click Open.
- A window titled “Launching Application” is displayed with a progress bar.
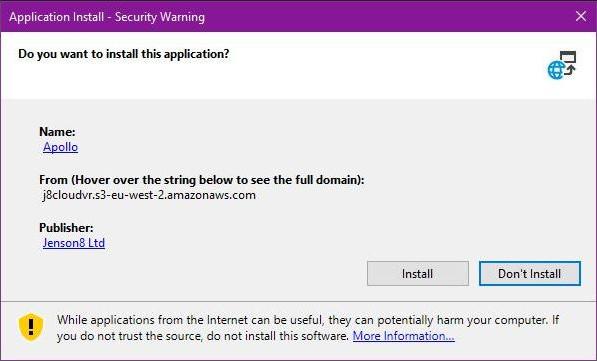
- Once the bar completes, a dialog box is displayed titled “Application Install - Security Warning”. Confirm that the Publisher field shows Jenson8 Ltd, and the install location is as show in the image below. Click the “Install” button.
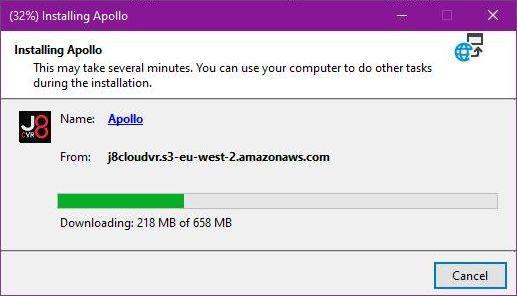
- The “Installing Apollo” window is displayed with a progress bar showing download and installation progress.
- When the progress bar reaches 100%, a window is displayed titled “Installation Succeeded”. Click OK on this window and the installer will close.
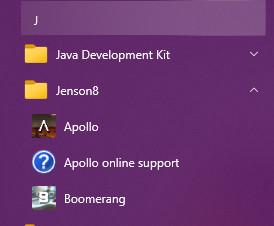
- Apollo is installed to the Start menu in a folder called Jenson8.


Updating Apollo Desktop
Every time the application is launched it will check for a version update, automatically downloading and installing it if there is one available. We recommend running the application immediately before your session to carry out this update check and potentially save time during game start-ups.